Wednesday, January 30, 2013

Crafters Of Faith Monthend Challenge…

Good morning, friends.    Crafters of Faith is a group of Christian bloggers that met and bonded on SplitCoast Stampers.   Every month, on the last day of the month, we post a card with a theme chosen by a member of our group.  This month’s theme was chosen by none other than me.  Here is what I challenged them with ….

2013 is here! What a great time to clear out the old to make way for the new:

  • For this challenge, I would like to see you use both old stash and new stash to create your card/project.
  • To add a little fun to the challenge, I'd love to see you try a new technique -- something you've never done before. You can check out google, youtube, or even the SCS forums and galleries for inspiration!
  • Make sure you tell me what's new and what's old and post a link or give a little description of the technique you used.
 
For this challenge, I made a shaker card.  This is something I’ve always wanted to try but never have yet.  I thought this was a great time to give it a go. 
SAM_0470

SAM_0481

I thumbed through my old stash of paper and found the heart paper used here (Sizzix Little Sizzles Watercolors paper pad).   I coupled that with some new pink cardstock from the Michael’s Recollections line of cardstock and embossed it with an old Cuttlebug swirls folder.   I adhered some new ribbon across the middle to cover the seam.

I used my Cameo to cut out the frame used for the shaker part of the card and tried a new technique to create the holes around the edges.  This is done by using the text on a path and typing a period with a point size of 72…enough to go all the way around the edge.  I used my sponger to apply some pink ink around the outside edges of the frame.

SAM_0474

I used an old stamp that I’ve never actually used before but had it sitting in my stash (Autumn Leaves Clear Stamps: Doodle Birds by Tia Bennett).  I picked it up at a scrapbook store garage sale a couple years ago for a couple of bucks.  I know some of you might cringe to hear this but I cut the stamp up so that I ended up with only the word love .  Then I colored the stamped image with Bic-Mark- Its.  

SAM_0489


You can piece the stamp back together again on a stamp block if you want to use it as a whole. 

I used some beads that I’ve had on hand from my jewelry making days as the “shaker” item.

SAM_0485


There is one other trick I discovered when making this card that I want to share with you.  The best way to make the “well” to hold the shaker items in is to line the outside of the hole with strips of Glue Arts NEW 8.5 x 11 sheet of U-Cut-It Foam.  It works great! Thanks to Lesley Langdon for this great tip.

SAM_0473


I added a bow to the top using American Crafts Elements ribbon to finish of the front of the card and then went to work on the inside.  Take a look…


SAM_0478

Here are the two tutorials I used to help me to create my shaker card.  Notice near the end of video #1 how she is shaking her card in order to get the beads unstuck from the edges of the pop up dots she used.  This is why Lesley’s tip of using Glue Arts U-Cut-It-Foam (see video #2) is such a great idea!  The edges of the foam strips are not sticky so the beads won’t stick to it.

http://www.simplypamscreations.com/
http://lesleylangdoncreative.blogspot.ca/

I hope you enjoyed my card.  I have so many other new techniques that I want to try so that I can share them with you.  I wish I had more time, sigh.  To take a peak at the cards made by the other girls in the group, check out the links on my sidebar to the right, near the bottom under Crafters Of Faith.

Enjoy the day!

Friday, January 25, 2013

Let’s Party

I made this card for another one of my nieces.  The image is by StitchyBear! Digital Stamps and colored with my copic markers (E0000/00/11/35, R81/83/85, B61/63/65, E35/37).

SAM_0437a

I thought the paper looked pretty groovy and was the perfect background for this hip chick.   A ribbon, a button, a die-cut and some faux stitching complete the card.


SAM_0441a

Wednesday, January 23, 2013

Bon Voyage…

This card was made for my niece who is going to Australia in a couple weeks.  She’ll be spending 5 months on the Sunshine Coast @ a Discipleship Training School.  It looks like an amazing experience and I’m a tad bit jealous, lol.   I wish her all the best though as I know she will be making memories that will last a lifetime!

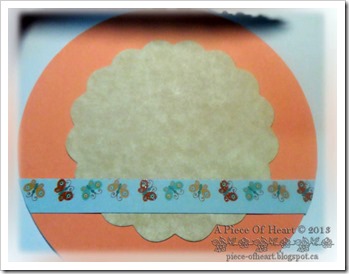
I used two pieces of designer cardstock from the K&Company Wild Raspberry paper pack.  Although you can’t see it very well in the picture, the checkered piece is pop up with pop dots to add some dimension.  I punched out a 2-inch scalloped circle and a 1-1/2 circle for the sentiment.SAM_0451a

SAM_0453a


I used a stamp from the Hero Arts Rubber Stamps Art of the Card Collection – Untitled Word Shadow Cling Stamp Set.  I hand wrote the words “the journey” to complete the perfect sentiment for the occasion.


This card is based on a sketch found at CAS(E) this sketch!

cts11

I am entering this card into the following challenges:

Clean and Simple Inspired

This weekend I had a family function to attend that consisted of several birthdays and a going away celebration.  I spent most of Saturday making cards to give to the special guests.

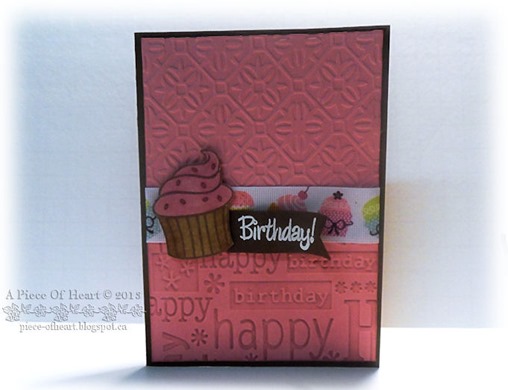
This card was made for my niece who was celebrating her 23rd birthday.   I really like the way this card turned out.  It’s simple and, in my humble opinion, it’s pretty.  She liked it, too.

SAM_0445a

SAM_0449a


I embossed the rose cardstock on the top and bottom with two different embossing folders.  I also used my sponger to lightly sponge some rose Tim Holtz distressed ink over the top of the embossed words on the bottom portion of the card.


  SAM_0447a

I added some ribbon to cover the seam between the embossing on the top and the bottom.  I colored the cupcake with my copics (R81, R83, E35, E37) and used dimensionals to pop it up.  I used Recollections Snow White embossing powder to emboss the word birthday on a rectangular piece of brown cardstock and cut triangles out of the ends to make a flag.  I curved the flag with a pencil to give it some dimension and adhered it to the card.

Supplies:

  • Inkadinkado Cupcake Stamps
  • Cupcake Ribbon from Michaels
  • Cuttlebug Folders (Happy Birthday Words … not sure the name of the other one but if you know, please tell me so I can credit it.
  • Michael’s Recollections Solid Cardstock – brown and rose.

This card is based on the following sketch found at the Clean & Simple Stamping blog…

CleanandSimple-Jan 21-FTL224

I’m entering this card into the following challenges:

Clean & Simple – Sketch Challenge (see above sketch)

Card Makin’ Mamas – Clean & Simple, no bells, no whistles

Daring Cardmakers – Embossability challenge

Joyful Stamper – Anything Goes

Simply Create Too – Anything Goes, digi only

Totally Papercrafts – Embossing Time

Copic Marker Europe – Anything Goes with copics

Paper Crafting Journey – Anything Goes

Simply Create – Anything Goes Linky Party

Tuesday, January 22, 2013

Last Chance…

I can’t believe it’s almost the end of January already.  You better hurry because there is only one more week left for the chance to win some free digis from Digi Darla by participating in the Clear it Out Challenge!  The challenge is CIRCLES…..make a circle card, put lots of circles on the card or round embellishments. You will find all the information on the blog so click HERE and check out the great cards the design team has to offer.

2nd-challenge

Tuesday, January 15, 2013

Clear It Out Challenge–Circle Time

Our theme for this challenge was anything goes, circles.  I decided to incorporate as many circles as I could and here is my result.  The paper I used is from Die Cuts With A View (DCWV).  I’m not sure which set it’s from because it came to me as a giveaway winner in 6-inch x 6-inch bundles of miscellaneous sheets.

SAM_0427

SAM_0425


The image is a digi from Digi Darla who is our sponsor for this month.  I colored it using my Copics and Bic Mark Its.


SAM_0432

SAM_0425abuttons


The buttons were from a giveaway as well. I used some twine and threaded it through the holes and added a little bow to one of them.


I cut out some circles with my punch and adhered them to the back of some white cardstock that I punched out using my 2-inch punch.  I adhered those to the inside of the card to create some writing space.

SAM_0435

I prefer the one that I made in error and shared the other day much more but this one turned out okay as well.

I’d love to see you join us for this challenge so why not give it a try and hop on over to the Clear It Out Challenge Blog.  Have fun creating your circle-themed card.  Don’t forget to share it here as well using the “share with me” feature on this blog.

SAM_0428

Sunday, January 13, 2013

Oops, I Made A Mistake

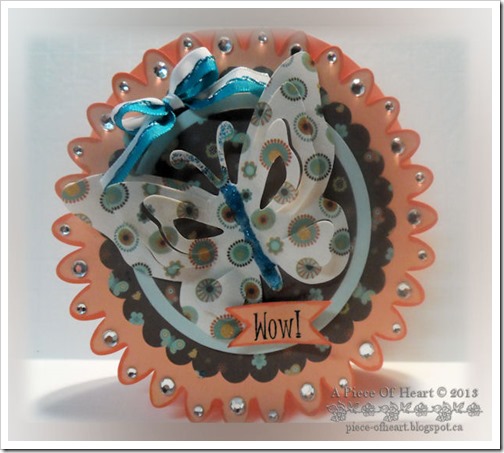
I spent a good portion of the afternoon making a card that was due for the Clear It Out Challenge Blog of which I am a member of the design team.  The theme was circles, anything goes.  The only problem was that I forgot to use the sponsors digi on the card…whoops, lol.   So, I put the thinking cap back on and came up with another card.  So that’s why can share this one with you tonight.

SAM_0414

SAM_0418


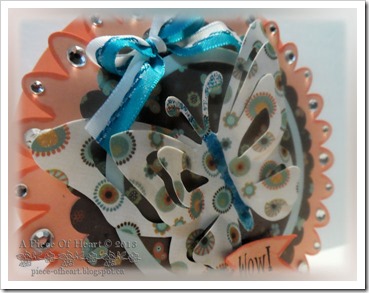
Here is a closer look at the butterfly which I cut on my Silhouette Cameo. 


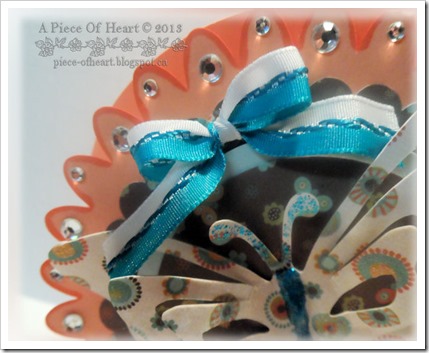
I love this ribbon that I used for the bow …

SAM_0415


And here’s the inside …  SAM_0421


I’ll share the correct version of the challenge card on Tuesday when the challenge goes live.  Thanks for looking.

Friday, January 11, 2013

It's Coming, I Promise!

I had the freebie all done and was about to upload it to the blog last night when a distressing emergency situation arose with my oldest daughter.  I shut my laptop and that was that.  After a sleepless night, I had to drag myself out of bed early and go to work.  My day was horrible, my head hurt(s) and I couldn't focus.  But I'm home now and all I need to do is upload it to the blog and it's yours to download.  Give me about 15 minutes and it will be done.

Thanks for understanding!

Friday, January 4, 2013

NO MORE Word Verification

Ok, so I tried for - what? - a few hours, lol.  I keep going back and forth on this issue but I'm now 100% sure that word verification as a spam catcher is not the way to go.  I'm still unsure of how I'm going to combat this nasty little spam devil but it won't be by word verification, I can tell you that.  I'm thinking I might give moderation a try but that may not last long either, lol.

Thanks for sticking with me :-)


As you may have noticed, I have set the blog so that you need to use word verification in order to post.  I know this can be a pain, but unfortunately, I have been receiving so many anonymous emails that I can’t keep up.  I feel like word verification is the lesser of two evils.  I hope that you understand and this doesn’t stop you from leaving me comments because I truly enjoy reading what you have to say!

Thursday, January 3, 2013

A Little Money In The Pocket

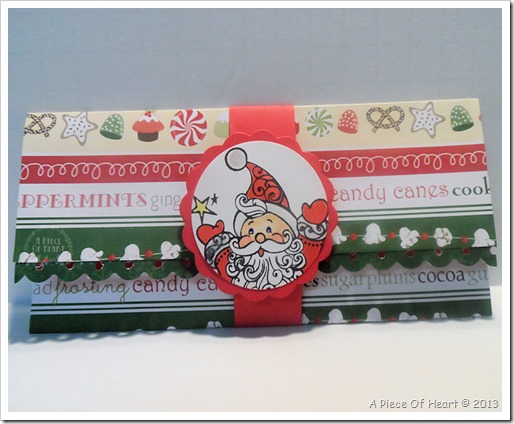
I wanted to share one more thing with you that I made this Christmas.  I have several nieces and nephews that are age 18 to 21.  Instead of buying gifts and risk getting something they may not like, we give them money.  My siblings do the same for my kids.  This year I decided I was going to dress the money up a little so I decided to make money cards to put it in.

SAM_0403

I had such a blast making these.  I made 8 of them using various designer cardstock.  They were all so cute.  Unfortunately, I gave them out before I took pictures so I made another one so that I could share it with you. 

SAM_0409 

First I took a piece of cardstock and cut it to 7-inches square.  Score it at 1-1/4 inches and 4-1/4 inches.  If you look closely you can see how I punched a half circle on the larger flap for easier access to the money.  Use a narrow piece of adhesive to stick the 2 edges of the larger flap down.

SAM_0406


I used my fiskars scalloped edge punch to cut a border out of some green paper and adhered it along the edge of the top flap.


SAM_0407

I made a belly band out of some red cardstock that I cut to 1-inch x 7-inches and scored at 2-1/8-inches and 5-1/4 inches to hold it closed.  When adhering the edges of the belly band together you need to make sure it’s loose enough to slide on and off the money card holder easily.  I stamped my santa image on some white card stock, colored him with copics and Bic Mark-Its and used my 1-1/2 inch punch to cut him out.  The stamp was much larger than the circle and he didn’t all fit but that’s okay because I liked him this way.  I cut a 2-inch scalloped circle out of some red cardstock and adhered the image to it.  Then I adhered that to the belly band.

SAM_0405


I put some liquid glitter on the fur of the santa hat and coat cuffs.  I’d love to know your favorite way to apply glitter to glitz up a card.  I’m not overly happy with the stuff I’ve been using.  I’d prefer a no-mess solution, lol.


Now, imagine 8 of these stuffed with $20 bills, the smiles on the faces of 8 happy nieces and nephews and the sound of laughter in the air.  What a joy it brought to my heart.

Tuesday, January 1, 2013

The End Of My Christmas Bonanza

I’m back and ready to share the last of my Christmas cards with you today.  I promised you that you would see my little angel friend again and here she is.  I adhered her to a fun red and white designer cardstock by Michael’s Recollections.

SAM_0261

SAM_0262


The sentiment I’m using on this card is one that I created and featured on my blog as a freebie in December.  I think in times like these when there is so much violence and war around us that it’s a very appropriate sentiment and one that I hope people will take to heart!


This card is a variation of another card that I made earlier.  Not a lot of explanation is needed. The only real difference is the paper I chose and the ribbon I used.  The sentiment used is one that I featured as a freebie in December.SAM_0259

SAM_0278

This card was fairly simple to make (i.e. not too time consuming).  I took a piece of green gingham ribbon that I had in my stash and wrapped it around a piece of designer cardstock. I adhered that to the base layer of my card (this time right-side up, lol).


SAM_0281


Next, I found a piece of cardstock in my Michael’s Recollections stack that had an image of a Christmas tree on the bottom right-hand corner of  it and cut around the outside circle of the image.  I added it to the center of my card with some pop dots (even the white stitching was already there; how convenient, lol)


SAM_0280


To finish it off, I added a die-cut that I had in my stash to the bottom right-hand corner of the card and I was finished!


I loved this little snowman so I used him several times on my cards.  This time I cut around him with my Silhouette Cameo and did the same thing with the snowflakes.  I used pop dots to pop him up on the card.  The sentiment is a freebie from Sara Sherlock at Folded Paper Printed Pixels that I just printed on my printer and cut around with my Silhouette Cameo.  The snowman was colored with Bic Mark-Its.

SAM_0275

SAM_0276


Here is a closer look of the bow.  The ribbon was a gift from the giveaway that I won from Kadie at In My Minds Eye Creations.  Thanks again, Kadie :-)


SAM_0241

Closing out the end of my Christmas Bonanza series is this card which may look familiar as I posted something like it earlier in December.  I changed it up a little by making it a square 6x6-inch card and adding a triple looped bow made with some gold, wire-edged ribbon that I purchased at Walmart.  The sheet music on the front of the card was one that I found on google, printed on my printer and cut with my Silhouette Cameo.  I added some jewels to make it sparkle.

Here is a closer-up of the triple loop bow that I  made with my Bow Easy and a closer peek of the sheet music!  SAM_0243

And finally, here is a look at the sentiment that I put inside all of my cards.

SAM_0282


I hope you enjoyed my Christmas Bonanza series.  I had fun sharing it with you! Thanks for taking the time to visit my blog.  I appreciate each and every one of you so much. 

Wishing you all an abundantly blessed 2013!