So, my husband went to check a lottery ticket he picked up before going away to NYC and he won ... wait for it ... wait for it … a whopping $128.00, lol. Oh well, better than nothing, right? I’m surprised he even told me about it, lol.
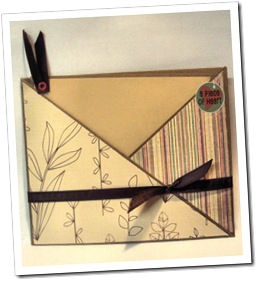
Two days ago I posted pocket cards that were long and narrow. I realized today they are actually called Criss-Cross cards. Today I’m showing you the regular A2 version of these cards. This makes card #33 in the 100 cards in 100 days challenge.
HOW IT’S MADE:
Cut 2 pieces of cardstock to 4 inches by 12 inches.
Score and fold both pieces at 6 inches.
Cut each piece on the diagonal from crease to corner as shown in image below.
Apply adhesive to the top of the left panel (rectangular section only) and adhere the 2 pieces together to make the base of the card. Make sure adhesive is as close to the edges as possible.
Cut a piece of designer paper to 5-3/4 by 3-3/4 inches and adhere to the rectangular portion of the card.
Apply adhesive to the bottom edge of the left flap. Fold flap in towards the center of the card and adhere to the base.
Cut 2 more pieces of designer paper to 5-3/4 by 3-3/4 inches. Cut each of them in half on the diagonal.
Take one of your pieces and adhere to the flap that is folded in.
Apply adhesive to the bottom edge of the right flap. Fold it towards the center of the card and adhere. Adhere the other piece of designer paper to the right flap.
Add any embellishments that you like.
INSIDE CARD:
Cut 1 piece of dark solid cardstock and 1 piece of designer paper to 5-3/4 by 3-1/2 inches.
Adhere the designer paper to one side of the dark cardstock.
Cut 1 piece of light solid cardstock to 5-1/2 by 3-1/4 inches.
Adhere the solid light cardstock to the opposite side.
Add a ribbon to the top as a pull and you're done.
Hope you enjoyed this tutorial.


So cute and looks like a lot of fun to make. I might need to try this.....thanks for the inspiration!
ReplyDeleteThanks, Carol. Have a great Sunday.
ReplyDeleteOh super fun -- congrats on your mini win! (or your dh's, lol)
ReplyDeleteSweet card - these are my favorite 'fold' cards to make! They make great Christmas cards, too :) Blessings and happy SONday! x0x0
Thanks so much for the great tutorial!
ReplyDeleteYou're very welcome, Charlene. Hope you come back again soon.
DeleteBeautiful cards. Love the colors. Thanks for the tutorial.
ReplyDeleteHugs Nana
♥ My Crafting Channel ♥
Email Me